Thursday, June 20, 2013

Peach and Blueberry Tart

Stone fruit and berries are some of summer's best gifts to all of us: peaches, plums, apricots, blackberries, blueberries, cherries.  I remember climbing trees and gorging myself on the very sweetest cherries and plums, and spending hot afternoons in my grandmother's backyard picking berries so I could add whipped cream for a quick dessert.  
Take advantage of their sweetness with this quick and tasty recipe on a budget: Peach-Blueberry or Blackberry Tart.  If you like a little variety, make half the tart apple and the other half peach--just mix it up--try your own combo.  You pretty much can't go wrong.  Add a can of Redi-Whip, and you are golden! 
Check it out!

Equipment:
Baking sheet or jelly roll pan (baking sheet with edges)
Parchment paper
Medium mixing bowl
Small mixing bowl
Fork or whisk
Ingredients:
3-4 peaches or nectarines, crescent sliced 
Pint of fresh blueberries or blackberries

1/2 jar strawberry or apricot jam
1 Tbls orange juice or apple juice

1/2 cup granulated sugar
1/2 - 1 tsp cinnamon 
Lemon juice from 1/2 lemon (avoids fruit from oxidizing)

Puff pastry, thawed & unfolded
1 Egg, slightly beaten with 1 tsp water

Powdered sugar
Balsamic Glaze (optional since adds to cost. use only if you already have it in your pantry)
RediWhip

Instructions:
1. Wash your hands.
2. Preheat oven to 425F degrees.
3. Un-Roll puff pastry onto baking sheet with parchment paper.
4. Use a knife to score the puff pastry along the edges, leaving a 1/2-3/4 inch border.


5. Microwave jam with juice until slightly "soupy".  Spread a thin layer within the scored area of the puff pastry.

6. Slice fruits (and peel if necessary) into crescent shaped pieces.


7. Toss fruit with sugar, lemon, and cinnamon.


8. Layer fruit slices onto jam mixture to barely overlap each other from one end to the next.


9. Drizzle fruit with remaining warm jam mixture.  
10. Dot the fruit with butter.


11. Brush (or use your fingers / hand) edges with egg wash.

12. Bake @ 425F x 10-15 minutes until edges start browning, then decrease heat to 350F.
13. Bake another 20-25 minutes until crust golden brown.
14. Add Balsamic Glaze. Or Vanilla Ice Cream. Or Redi-whip.  Or all three.
15. You decide how far you're going to take it.


Sunday, June 16, 2013

Dragon Bites

Happy Father's Day Everyone!!
Fire up the grills and relax, because we are letting another marinade do the work today, even though we are still wearing hoodies in the Midwest in mid-June, really?   Summer is coming, and this weekend's recipe is about heat and grilling--either for real or in a grill pan!  Plan ahead since the meat needs to marinate for at least 4 hours!

This marinade can be used for steak or chicken since steak is not a college student staple by any means, but on occasion, have everyone pitch in when you see a sale; or, have the house purchase a membership to Costco so that bulk meat, veggies, freezer goods, and staples can be bought at a reasonable rates.


Beware! This is marinade is meant to be hot, so if you are worried you'll render the meat inedible, or you just can't handle it, tone the spices down about 50 percent!  And whoever eats at the table tonight...no whining!  Put a few of these bites into a pita pocket and add a few veggies--great meal and you are good to go!


Equipment:
Marinating Dish or Freezer Size Zip Lock Bags
Functional Stove and Grill or Saute pan
or
Available Grill-charcoal or gas
Bamboo Skewers, soaked in water
Toothpicks


Ingredients:
2-3 Sirloin (or Chicken Breasts), cut into 1 inch cubes

1 cup Olive Oil
1/2 cup Soy Sauce
4 tsp salt
4 tsp pepper
2-4 tsp cumin
2-6 tsp cayenne pepper
3 Tbls brown sugar
2-3 garlic cloves, minced
Lime juice
2-3 Tbls honey

Dipping Sauce:
1 cup mayo
1/4 cup chipotle peppers (canned) or 1/4 tsp cayenne + 1/2 tsp curry
1/4 cup lime juice
1/2 tsp salt

Instructions:
1. Wash your hands.
2. Cut steak or chicken into 1" cubes approximately
3. Combine all ingredients from olive oil to honey in a small mixing bowl.


4. Pour marinade over meat and marinate for 4 hours at least

5. Make your dipping sauce by combining the other ingredients and adjust to taste.

6. If grilling, skewer up the kabobs with 5-6 cubes, and grill for approx 5 minutes on each side. (It depends on how well done you like your meat.)
7. If pan-grilling or searing, simply brown the meat in the skillet to your preferred done-ness level.


Make It Stop Plain

Female=Fitted Make It Stop


No Whining Green

Make It Stop Box 


Large Text Make It Stop

Wednesday, June 12, 2013

Roasted Corn with Jalapeño, Lime and Manchego

Nothing says summer like corn.  We seem to go crazy with fresh corn once it becomes available, and I always try to make a few extra cobs whether I'm grilling them or boiling them in a pot of water.  Any leftovers are perfect additions to salads, quesadillas, or salsas.


But sometimes, I tire of flossing at the dinner table and getting my hands all buttered up...and this recipe from Epicurious Mobile App is just the solution:

Roasted Jalapeño-Lime Corn with Manchego.

Since summer doesn't last forever, and I don't always feel like shucking corn or pulling the grill out, you can use good-quality canned corn kernels (in water without additional flavors or sugar).
Great side dish!


Equipment:
12" skillet
Spatula or wooden spoon
Serving Bowl
Grater

Ingredients:
2 cans corn kernels / or 6 ears of sweet corn, unhusked
2 Tbls extra-virgin olive oil
2 Tbls butter
Kosher salt
Fresh ground pepper

1 jalapeño, seeded, finely diced
1 medium shallot, finely diced
1/2 tsp crushed red pepper flakes

3/4 cup manchego cheese, finely grated
1/2 lime juice and zest (adjust for taste)

Instructions:
Do not plan on walking too far from the stove-top. 
This recipe is not hard but you do have to pay attention to the skillet for 30-35 minutes.

Option A: Roast The Corn Yourself
1. Wash your hands.
2. Preheat oven to 450F degrees.
3. Roast unhusked corn on a baking sheet  x15-20 minutes, turning occasionally.
4. When heated thru, set aside and cool.
5. Shuck corn, remove kernels from cobs.  Discard cobs.
6. Follow same instructions as in Option B / Step 3. below.

Option B: Open A Can of Corn
1. Wash your hands.
2. Open and drain 2 (14oz) cans of corn.
3. Heat oil in a large skillet over high heat.


4. Add shallots and jalapeño and sauté until slightly brown.


5. Add corn kernels, however you got them.


6. Saute corn until golden brown, approximately 30-35 minutes.


7. Add butter and stir until melted.


8. Transfer corn mixture to a wide bowl or deep platter and stir in salt, pepper, and pepper flakes.
9. Squeeze 1/2 lime into mix


10. Add manchego cheese and zest.  Stir.


11. Serve immediately


Thursday, June 6, 2013

Simply Roasted Edamame

Roasted edamame may not sound exciting to most of you, but if you tagged on 'the freshman fifteen' this year, you might just be looking for a few healthy snacks other than baby carrots.

Do not be fooled.  Despite it's simplicity, this recipe is delicious for snacking; and, it's a recipe you can build on if you want more complexity.  Try adding in sautéed garlic, shallots, a dash of red wine vinegar and olive oil...just a suggestion for a simple side protein.

Equipment:
Oven
Baking pan or "jelly roll" pan (it needs sides)

Ingredients:
Frozen bag of edamame, or double it
Olive oil
Salt & Pepper


Instructions:
1. Wash your hands.
2. Preheat oven to 250F degrees.
3. Open the bag of frozen edamame.
4. Spread onto pan


5. Sprinkle with olive oil.
6. Salt &Pepper


7. At 20 minutes, remove the pan and shake pan to re-distribute beans.


8. Finish roasting until beans slightly wrinkled with a touch of brown, about another 20 minutes.


9. If adding shallots, garlic, vinegar, toss it altogether in a bowl and then season to taste with S & P and olive oil.

10. Be surprised at how good 'simple & healthy' can taste!

Sunday, June 2, 2013

Starter Quesadilla

Sometimes it's ok to let others do the cooking, especially with things like roasting chickens.  And this recipe is one of those go-to meals with few ingredients (unless you are feeling adventurous), but all the flavor, warmth and satisfaction:  Simple Chicken-Cheese Quesadillas.

All you need is a skillet that fits the tortillas you bought, olive oil, shredded chicken, and cheese. And your favorite salsa--homemade or storebought--I personally have just gotten hooked on Mango-Peach-Jalapeno Salsa.  A recipe for a later date.


 If you want to make it into something more, knock yourself out--add minced jalapeños, corn, black beans, shrimp, green onions, or anything else you love.  Have fun!

Equipment:
1. Skillet, 8" or 10" or 12"
2. Stovetop


3. Shallow plate with thin layer of olive oil.
4. Spatula to flip


Ingredients:
1. Tortillas, as many as you want to make
2. Olive Oil
3. Shredded Cheese (cheddar, mozzarella, gouda, cotija, or whatever's in the fridge)
4. Roasted Chicken, pulled apart and shredded

Instructions:
1. Place a tortilla on the oiled plate.  (This is important to get that nice smooth golden brown sear.)
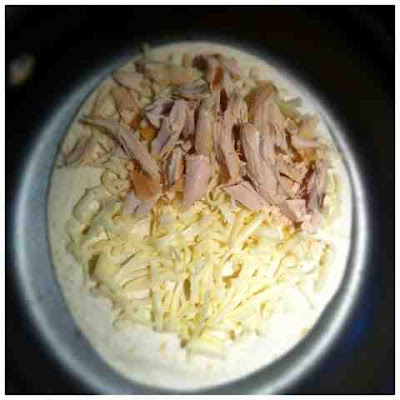
2. Prepare the ingredients of your quesadillas shown.


3. When you are ready to cook the tortilla, have your skillet ready at 'Medium Heat' and transfer the tortilla to the skillet.


4. Once the cheese begins to melt, gently fold the cheese side over onto the chicken side.


5. Continue cooking until both sides are golden brown.


6. Dip in your favorite salsa, sour cream, or have it plain.


Have a Wonderful Week!