Showing posts with label Cayenne. Show all posts

Friday, September 13, 2013

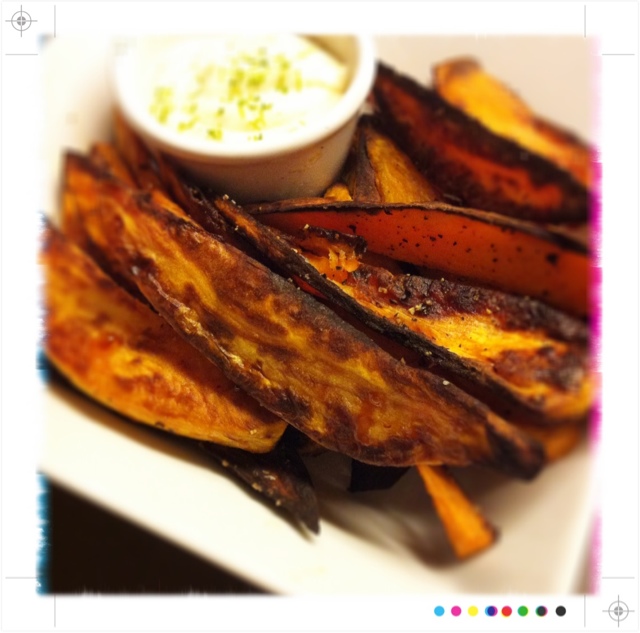
Sweet Potato Fries with Lime Mayo Dipping Sauce

Great games coming up this weekend: Alabama vs Texas A & M.  Notre Dame vs Purdue.  I could go on and on.  Probably your school is having a party even if they are playing in the SEC or Big10, but whatever, you do, I know you don't want to slaving over the stovetop preparing food.


Make it simple this weekend:  Try the Marinated Flank Steak or Bandilicious Chicken Marinade.  Make your own salad or stop by Homemade Pizza for one of their seasonal salads.  And throw these in the oven.  Then...step away.  Enjoy the game!

Found this recipe in one of Epicurious magazines--delicious.  Approx cost: $3-4.

Equipment:
Large Baking Sheet
Aluminum Foil
Mixing bowl
Grater with a fine tooth side

Ingredients:
2-3 large sweet potatoes, peeled and sliced into wedges
1-2 Tbls of vegetable oil (do not add excessive oil--potatoes won't crisp)
Salt & Pepper

Dipping Sauce:
1/3 cup mayonnaise
1/4 tsp lime zest
1/8 tsp cayenne
1-2 tsp of lime juice


Instructions:
1. Wash your hands.
2. Preheat oven to 450F degrees.
3. Cover baking sheet in foil and spray with PAM


4. Toss the sweet potato wedges with vegetable oil on the baking sheet and spread out on sheet


5. Salt & Pepper potato wedges.


6. Bake in oven for 15-20 minutes.  Turn wedges once, and finish baking 15 minutes longer.


7. Combine mayo thru lime juice in a bowl.


8. Potato wedges should be golden and crisp.  Get your platter out and serve with dipping sauce.


9. Awesome.
10. Enjoy the compliments.

Thursday, September 12, 2013

Bandilicious Chicken Marinade

Everyone needs a go-to marinade in a pinch--this one is not exclusively for chicken, but could be used for vegetables you are planning to grill or sauté.  Whisk everything together and let the marinade work its' magic while you go to class, the gym, work, whatever.  When you return, preheat the oven and set your skillet on MEDIUM-HIGH.


What makes this marinade so flavorful is an old time classic seasoning salt: Cavenders Greek Seasoning  found in any grocery store where the spices and salt and pepper reside.

Equipment:
Pyrex dish (for marinade or use large freezer bag)
Baking sheet covered with aluminum foil and large enough to fit all chicken breasts
PAM Non-stick spray
Large Non-stick skillet (for sautéing)

Ingredients:
3-4 large skinless chicken breasts, scored


Marinade:
6 cloves garlic, chopped
1/2 to 3/4 cup olive oil
Juice from one lemon
Juice from 1/2 lime
3-4 tsp of Cavender's Greek Seasoning
2 tsp of Cayenne
2-3 tsp of Freshly ground pepper to generously coat one side of chicken
2-3 tsp of Kosher salt, enough to generously coat one side of chicken

Instructions:
1. Wash your hands.
2. Place chicken breasts in a pyrex dish after scoring the breast with a sharp knife


3. Salt and pepper the chicken breasts generously.


4. Sprinkle the cayenne and Cavender's Greek Seasoning over chicken.


5. Add the olive oil and squeeze the lemon and lime.


6. Add the minced garlic.


7. Take your washed hands and lather the chicken in the marinade.
8. Make sure you push garlic and spices into the scored slats of the chicken breast and any other layers.


9. Cover the pyrex with seran wrap / clear wrap and let marinate for several hours.


10. Once you are ready to cook chicken, preheat the oven to 350F degrees.
11. Remove chicken from marinade onto a plate with paper towels and pat dry.


12. Allow chicken to come to room temperature.
13. Cover your baking sheet in foil or use PAM non-stick spray
14. Heat your non-stick skillet over MEDIUM-HIGH.


15. Sear the chicken with breast side down for 3-4 minutes and DO NOT TOUCH or MOVE it!


16. Sear the other side for 3 minutes.


17. Place all the chicken breasts on your prepared baking sheet and bake for 15-20 minutes.


18. Remove from oven and cover with foil for 5 minutes to complete cooking.
19. Slice the chicken and serve with your salad, rice or taters.

Sunday, August 11, 2013

Burrito Power Play

Not sure where summer went.  Took forever to get here and now it's already on its' way out with students headed back to campus and schedules being made.

If you have moved off-campus and suddenly realize that cleaning the house, washing your clothes and having home-cooked meals is now your responsibility--take some time to prepare for the week.  This blog won't solve the dirty room or laundry basket, but it will provide suggestions for simple foods to keep you full and nourished.

Tip:
--Master simple cooking skills to avoid buying expensive pre-packaged, unhealthy, or frozen meals.


If you don't have time in the morning, make a batch of these the night before and heat them up on your way to class! Start the day right! 

This recipe was slightly modified from The Epicurious Cookbook / Egg Burritos which was submitted by one of its' readers who first made this dish when he was 5 years old--I think you can all handle this one if you have been reading the blog.

Equipment:
Large non-stick skillet
Non-stick spatula
Mixing bowl
Fork, for mixing

Ingredients:
4 eggs, lightly whisked together
1 tsp of milk
2 Tablespoons of your favorite salsa
1 cup of shredded sharp cheddar cheese--divided into 1/2 cups.

8 oz of breakfast sausage
1-2 cloves garlic, minced
1/4 tsp of cayenne

Tortillas, medium or large (for on the go) / small if sitting down at home

Instructions:
1. Wash your hands.
2. Get all the ingredients prepared before getting started.
3. In a large non-stick skillet brown the sausage.
4. Add the garlic and cayenne to the sausage once it is almost browned completely.


5. Whisk 4 eggs together with milk.


6. Combine eggs with salsa, 1/2 cup of cheese and black pepper.


7. Heat your large non-skillet on MEDIUM and pour egg mixture into skillet.
8. Add crumbled sausage.


9. As demonstrated in the Scrambled Egg blog--use a spatula to gently stir the mixture while it cooks.


10. Have your tortillas warmed in the oven or microwave.


11. Spoon a generous helping into your tortilla--if you are headed out the door, use large tortillas to take maximum filling with you.


12.  Use the other 1/2 cup of cheese to top off each burrito before rolling it up.


13. Add extra salsa if you like or hot sauce here.  Roll this baby up.  


14.  Now that's delicious!


Tip:
Don't like sausage?--skip it or exchange it with Canadian Bacon or Regular Bacon.  Or make it meatless and use sauteed peppers / onions instead.

Saturday, July 20, 2013

Meatball Minis

Reasons to have a good and tasty meatball recipe:

A. Cheap
B. Easy 
C. Delicious
D. Versatile
E. Incredibly satisfying as a meatball slider; or, with spaghetti & red sauce, or, simply, on a toothpick. 

I found this twist on meatballs from Ted Allen's 'In My Kitchen' cookbook and thought I'd share it just because any college kid looking for ways to keep things simple, affordable without sparing the tastebuds will want a "go-to" meatball sub or pasta dish.


Check it out. 
Total cost: approx $15 to $20
Makes: approx 22-25 nice size meatballs

Equipment:
Large mixing bowl
Large Non-stick skillet
(If your skillet is smaller, you will have to do meatballs in 2 separate batches)
Functioning stovetop with electricity

Ingredients:
1 lb ground beef
1/2 lb ground pork
1/2 medium onion, finely chopped
2 cloves garlic, finely chopped or minced
1/4 cup parsley, chopped
1/2 cup Parmesan cheese, grated
1/3 cup breadcrumbs
1/3 cup chicken stock
2 large eggs
1 1/2 tsp kosher salt

1/8 -1/4 tsp of cayenne 
( if you don't like spicy, just use regular black pepper)

1 jar of your favorite quality marinara / pasta sauce
Regular dinner rolls for sliders, hoagie roll for meatball sub, or box of pasta--you choose how to use these delicious and spicy bites.

Instructions:
1. Wash your hands and read all steps.
2. Combine all ingredients into large mixing bowl.


3. Form approximately 22-25 golf-ball size meatballs with your washed bare hands


4. Heat large non-stick skillet with 3 Tablespoons of olive oil over MEDIUM


5. Place meatballs in a single layer in skillet so that they do not touch. 
6. Brown meatballs on all sides. Do not rush this step. Takes about 15 minutes.


7. Once all the meatballs are browned, but not fully cooked, add your favorite red sauce to the skillet along with the meatballs.


8. Let this simmer on LOW until meatballs fully cooked. 
9. Toast your slider rolls with butter in the meantime.


10. Add meatball with provolone, and your slider is done! 


Alternatively, make a box of spaghetti and have 'Spaghetti & Meatballs' instead; and, use the rolls for garlic toasts.