Showing posts with label Sharp Cheddar. Show all posts

Sunday, September 28, 2014

Chicken Tortilla Soup

I'm loving this fall weather! Say no more!
But you can begin to feel a touch of chill every now and then brushing your cheeks and reminding you that the days will be getting shorter.  As I have started to lay-out the recipes that our son continues to ask for, I am fully aware that this is the time to bring in a few more soups (one of his favorite foods). You just can't go wrong here: little skill required, large amounts, cheap on the budget, and satisfying to the soul--all the things a college student needs when living off-campus.


This version of Chicken Tortilla Soup I found in a doctor's office magazine from WebMD! Perhaps this is not as complex as the original recipe, but with a few modifications, it is a lighter version and delicious nonetheless! Plus, if you are having friends over, this is a great substitute for the heavy-bean-laden American 'chile con carne' that might increase the risk of death by fumigation. 

Avoid spontaneous combustion and try this option instead!

(Adapted from WebMD magazine-Sept 2014 edition)

Chicken Tortilla Soup

Equipment:
Large dutch oven or 5 quart sauce pan
Can Opener
Wooden spoon / ladle
PAM spray
Toaster oven

Ingredients:
1 Tbls olive oil
1 medicum onion, diced
4 cloves garlic, minced
1 green pepper, diced (I skipped this because green pepper over-powers everything)

1 1/2 lbs of chicken breasts

2 tsp of chili powder
1-2 tsp of cumin
1/2 tsp salt
1/2 tsp pepper

28 oz Crushed Tomatoes (I used San Marzano)
4 oz Green Chiles, diced
32 oz of chicken stock (I made mine from chicken bouillon to avoid cost of pre-made)
2 cups hot water
15 oz can black beans, drained and rinsed


Extras:
Corn tortillas
Avocado
Jalapeños
Sharp cheddar cheese, grated
Sour cream
Hot sauce
Cilantro
Lime wedges.

Instructions:
1. Wash your hands and surfaces frequently with raw chicken. Prep the garlic and onion.


2. Heat olive oil in your large sauce pan and add onions and garlic until softened.


3. Add your chicken breasts and spices to coat all the ingredients.


4. Add the tomatoes, chiles, stock, and water.


5. Simmer x 20 minutes.


6. Remove and cool the chicken breasts.


7. Once chicken is cool enough to handle, shred the chicken meat with 2 forks and return to soup with the black beans.


8. Simmer x 20 minutes.


9. Cut your tortillas into thin strips and spray with PAM. Toast until crisp.


10. Fill your bowls with cheese, tortilla strips and cover with soup.


11. Garnish with avocado, lime, more cheese, tortilla strips, sour cream and cilantro.
12. You just got yourself a meal!

Tuesday, December 3, 2013

Egg White Omelet For One

The egg-white omelet is really no different than the 'Basic Omelet for Anthony'.  It just consists of a few different ingredients, and two additional steps--chopping and sautéing a few veggies.  Egg-whites don't always have the richness and depth of flavor that a whole-egg omelet will have, thus, I suggest adding a few veggies and a little cheese.


A time-saver for this recipe is to buy the egg-white cartons which will save you time and avoid wasting the yolks; however, buying pure egg-whites is not always the cheapest route.  You will need to decide what suits your budget and schedule best.

Equipment:
Cutting Board
Knife
8" non-stick skillet

Ingredients:
1 tsp butter
PAM Spray
1/3 cup of egg whites, to cover the skillet

1/4 cup sharp cheddar
2 Tbls yellow or red or green peppers
2 Tbls onions (red, white, yellow or green)
2 Tbls Canadian Bacon (or ham)

Instructions:
1. Wash Your Hands.
2. Prep your veggies and sauté in 1 tsp of butter over MEDIUM heat.


3. Once they are partially cooked (to your liking), set them aside.


4. Spray your skillet with PAM and leave the heat at MEDIUM.


5. Pour 1/3 cup of egg-whites into the skillet to cover entire skillet surface.


6. Do not touch, lift or jiggle.  Let it begin to congeal!
7. As it begins to turn 'cloudy', add your salt, pepper, cheese.


8. Sprinkle your veggies and ham over top.


9. Use a spatula to separate the edges and gently fold one half onto the other.  May need a large spatula.


10. Turn the heat off and let sit for 30 -60 secs.
11. Slide onto a plate with toast and a bottle of hot sauce (or ketchup).


Wednesday, August 28, 2013

Skillet Mac N Cheese

One of my sons was is a particularly picky eater growing up, and while the rest of us had Beef Stroganoff or Chicken & Rice, he would only have the egg noodles or rice plain.
Including Ben's palate with our meal plan was quite a challenge to say the least.  That is, until I discovered 'Skillet Mac 'N Cheese' from Cooks Illustrated The Best 30 Minute Recipe Cookbook...after which the Velveeta and Kraft boxes started having a very long shelf life.


What makes this recipe ideal for any apartment dwelling college student is the simplicity and need for limited equipment; however, you do need some patience and prep work for seperate steps. But, if you do that, and have your ingredients ready...you will be generously rewarded for your efforts.  If you are new to cooking, expect this recipe to take a few tries to master! 

Equipment:
5-qt saucepan
Whisk or Fork
Spatula or wooden spoon
Stovetop

Ingredients:
3 cups pasta, ie elbow, penne, or gemelli
3 1/2 cups water

1 12 oz can Evaporated Milk, divided 1 cup and 1/2 cup
1 tsp corn starch
1/4 tsp Dijon Mustard or 1/2 tsp dry mustard
1-2 splashes of Tabasco Sauce

2 cups Monterrey Jack-type cheeses, grated
2 cups Sharp Cheddar, grated
2 Tbls butter
Salt & Pepper


Instructions:
1. Wash your hands.
2. Read the recipe. 
3. Prepare the thickener: 
    Combine the  evaporated milk, cornstarch, mustard, and hot sauce. Set aside.


4. Boil pasta while stirring frequently until pasta is "just" cooked.


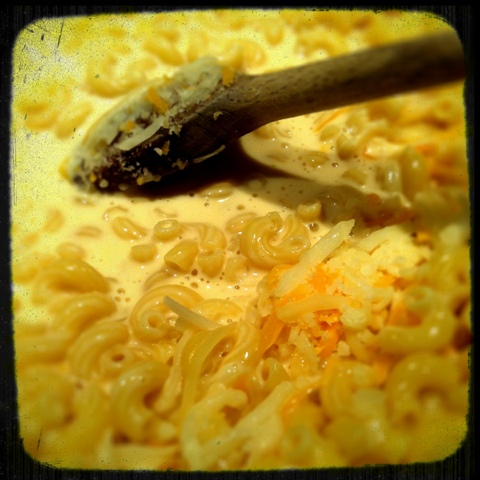
5. Add milk-thickener mixture. Stir for 1 minute until begins to thicken.


6. Remove from heat. It will look "soupy" at this point. Don't worry, be happy!
7. Add cheese one cup at a time--YOU MAY ONLY NEED 3 or 3 1/2 cups.
(Adding too much cheese will make the pasta heavy,  sticky and matted because when it begins to cool, it will congeal even further. )


8. Add 2-3 Tbls of butter.


9. Season with salt & pepper.
10. Once finished, the Mac 'N Cheese should have a velvety golden appearance.


11. If too thick, add water or milk in very small amounts
12. If too thin, add the remaining cheese.
13. Serve immediately.  We had turkey burgers, arugula salad and mac 'n cheese.

Sunday, February 3, 2013

Quick-Fix Taco(s) Salad

Tacos are perfect for any college kid who needs volume and substance. Variations are endless. Just put out the fixin's and let everyone do their own thing: salad, soft taco, hard-shell...whatever!


Equipment:
1. 10-12" Non-stick skillet
2. Lots of bowls for condiments

Ingredients:
1. 1 lb Ground Beef, browned
2. 1 bottle Ortega Medium Taco Sauce,
3. Hard-shell Taco Shells
4. Soft Tacos
5. Tortilla Chips


Instructions:
1. Crumble the meat into the skillet and let brown as seen in picture before flipping or browning the rest
2. Once meat is almost browned, add 3/4 bottle of the taco sauce.
3. That's the hard part.  If the meat is done, you are golden.

Alternatives:
A.  Leave out meat altogether.  Substitute black beans or refried beans.

B.  Brown a diced jalapeño with the meat.  Add garlic powder, Tajin Classic Seasoning, salt and pepper for a more savory option. Finish off with squeezed lime.

Fixin's:

*Lettuce
*Tomatoes
*Sharp Cheddar, shredded and lots of it
*Salsa
*Sour Cream
*Jalapeños, fresh or pickled
*Onions
*Re-fried Beans or Black Beans
*Guacamole
*Olives

The Assembly Line--any which way you like it:


Dig in! Oh yeah...you can't, it's just a picture.  You will need to get cookin', I guess.
Don't tell me your roomates won't love you if this is served tonight!