Sunday, August 16, 2015

Pucker Up Citrus Cookies

Can't believe summer is almost over! It's just now starting to hit 90 degree weather! For some, school has already gotten started…for others, enjoy the remaining few weeks that are left!  

If you are packing up for the dorm or off-campus living, take some of these with you to make an entrance or first impression, or welcome your roommates back--either way, you will keep and make a few new friends! These little bites are light, buttery citrus-infused desserts that melt in your mouth with a pop and wake-up call.


Super easy recipe for college cooking; although, having a hand mixer is necessary. Hopefully, if you have been cooking (and baking) along since the inception of this blog, you (or someone around you) has one to utilize! Key to this recipe is having butter and eggs at room temperature and your ingredients prepped. Things will go fast from stirring to eating. Enjoy!

(Adapted from Pioneer Woman's Frontier Cookbook)

Pucker-Up Citrus Cookies

Equipment:
Baking sheets, preferably with parchment paper
Mixing bowls
Zester or Grater
Whisk or fork


Ingredients:
4 sticks butter, softened
1 1/2 cups sugar
2 egg yolks (put 1 egg white aside)
1 Tbls orange, lemon, lime zest each
4 cups of flour
2 Tbls orange, lemon or lime juice (choose your preference)


Icing Ingredients:
1 1/2 cups powdered sugar
1 Tbls whole milk
1 Tbls zest, your choice
1 Tbls egg white (optional)
Juice of 1/4 lime
Juice of 1/4 lemon
Dash of salt

Instructions:
1. Wash your hands.
2. Preheat over to 350F degrees.
3. Prep all of your ingredients.
4. Cream the butter and sugar in a large bowl.


5. Add the egg yolks.


6. Add the zests.


7. Add the flour until just incorporated.


8. Add 2 Tbls of juice--choose your preference--lemon, lime, orange.


9. Use a heaped teaspoon size to roll balls of batter and place them on a lightly greased cookie sheet or parchment-lined cookie sheet and bake x 10-12 minutes.


10. Make the icing combining all ingredients into a small bowl, and dip each cookie once they have cooled.


Prep these cookies for travel and consumption!


Monday, August 10, 2015

Never Eat Alone: Chicken and Sausage One Pot Meal

I am always trying to find simple meals for my busy schedule! Browsing thru the Cook's Country Magazine this weekend, they featured a little known old-school Southern recipe called the 'Carolina Chicken Bog'--what the heck does that mean? 


Well, after reading the recipe, I translated it to mean: Simple. Affordable. Delicious. Flavorful. Satisfying. Crowdpleaser. 

In fact, a 'bog' recipe was originally intended to "combine inexpensive ingredients--chicken, smoky sausage and rice--into an easy one-pot meal that works for big weekend gatherings"…so, I decided to try it out (with a few adjustments)!

Perfect for college cooking and college living. Invite someone to dinner tonight for some low-country cooking!

Carolina Chicken & Sausage Bog

Equipment:
Large Dutch oven with lid


Ingredients:
2 - 3 large chicken breasts, cooked and shredded 
(or, store-bought roasted chicken if time an issue)

1 Tbls butter
1 Tbls grapeseed or vegetable oil
8 ounces of Hillshire Farms Kielbasa (Reduced Fat), 1/4" sliced
1 onion, chopped
3 garlic cloves, minced
4 cups chicken broth (or re-constitue bouillon cubes)
2 cups long-grain rice
2 cups fresh or canned corn


Instructions:
1. Wash your hands. 
2. Remove meat from roasted chicken and prep all ingredients.


2. Heat 1 Tbls oil in large dutch oven over MEDIUM heat.
3. Add sausage and onion and cook until onion becomes translucent, approx 3-5 minutes.


4. Add garlic and cook until fragrant, approx 30 seconds.


5. Add rice, broth, salt and pepper.  
6. Stir and cover with tight-fitting lid and cook x 20-25 minutes until rice is done.


7. Add shredded chicken, corn, and stir until combined. 
(this photo without corn, obviously)


Top it off with chopped parsley or parmesan cheese!
Call your friends.


FYI. The original recipe calls for skin-on chicken thighs (ultra cheap):
--searing the skin-on chicken thighs or breasts in large dutch oven, removing skin,and setting aside.


--adding chicken back to the sausage, onions, and garlic with the broth, salt and pepper and cooking x 20 minutes.


--removing the chicken from broth and dutch oven. cooling and shredding.
--adding rice to dutch oven, covering and cooking x 20 minutes until rice is done.
--finally, re-adding chicken back to dutch oven.


I find this too cumbersome for college cooking!

Saturday, August 8, 2015

Meyer Lemon Mock Alfredo

Sunshine. Summer. Citrus. 
It all comes together in this linguini or bucatini pasta dish perfect for college cooking and college budgeting! Less than 24 hours after making this for dinner…Jon had consumed the rest for breakfast! 


If you can boil pasta and put a few ingredients into a magic-bullet blender, this is perfect for college living on a tight grocery budget; and, can be done with little or no skills! Honestly! 

Eat better! Cook smarter! Save money! Eat together!

(Adapted from The Cooking Light 2015 Dinner Tonight Magazine)

Meyer Lemon Mock Alfredo

Equipment:
Magic Bullet Blender
Large Pot (for boiling pasta)
Large Non-stick skillet

Ingredients:
8 oz long pasta, any type (1/2 box)
1cup pasta water, set aside

1/2 cup Part-Skim Ricotta cheese
1/4 cup Meyer lemon (or regular lemon) juice
2 tsp grated or zested Meyer lemon rind
1/4 cup Heavy Whipping cream
1/4 cup chopped chives
1/4 cup Parmesan
1 tsp kosher salt 
1/2 tsp fresh pepper


Optional For Special Occasions / Added Protein:
Seared / Sautéed shrimp
Seared / Sauteed chicken breast


Instructions:
1. Wash your hands.
2. Boil your pasta. Drain & set aside 1cup pasta water. Prep your ingredients.


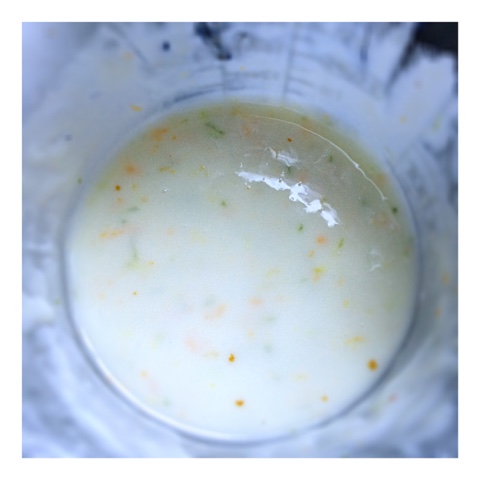
3. In a magic-bullet blender, combine 1/3-1/2 cup of pasta water, lemon zest, ricotta,cream, and juice.
4. Pulse until well-combined.


5. Heat a large skillet over MEDIUM heat and add the ricotta cream sauce.
6. Cook for 1-2 minutes until heated.


7. Add the cooked pasta, chives, salt, and pepper. 


8. If pasta too sticky, gradually add 1-2 Tbls of remaining pasta water.
9. Remove from heat and stir in parmesan.


If mom and dad have bought your groceries. or your celebrating an awesome event and achievement, take it up a notch with a few seared shrimp. Or, sear a chicken breast for some added protein if you can't live without the meat.

Wednesday, August 5, 2015

Perfect Chocolate Snickerdoodles

Awesome right here! Don't miss this super easy college cooking recipe! Not over the top with crazy ingredients or equipment--just pure delish!! These cookies roll up in a flash and go down in an easy bite that melts in your mouth. 


Even if you don't have the traditional 7-speed hand mixer, you can probably whip these up just as well with good ol' upper body strength. Make these happen and you will have a new set of friends! 


(Discovered from Hand Made Baking by Kamran Siddiqi in his recent cookbook)

Perfect Chocolate Snickerdoodles

Equipment:
Baking sheets with parchment paper
Mixing bowl
Hand Mixer (borrow one)
Extra bowl
Sifter or use a sieve
Spatula


Ingredients:

Sugar-Dip:
2 Tbls fine granulated sugar
2 tsp ground cinnamon

Batter:
2 1/2 cups all-purpose flour
1/2 cup Dutch cocoa / unsweetened cocoa powder
2 tsp baking powder
1/4 tsp fine sea salt (or dash of table salt)

1 cup unsalted butter, softened at room temp
1 1/2 cups of granulated sugar
2 large eggs, at room temperature
1 tsp vanilla


Instructions:
1. Wash your hands.
2. Preheat oven to 350F degrees.
3. Prep your baking sheets and Sugar-Dip (I suggest a double batch). Set aside.


4. Sift your flour, cocoa, baking powder, and sea salt together.


5. Cream butter and sugar together until light and fluffy. Scrape down walls of the bowl.


6. Add eggs one at a time with the vanilla until well-combined, approx. 1 minute.


7. Add your sifted, dry ingredients until just combined.


8. Use large tablespoon to drop rounds of dough into the sugar dip. Dough is wet.


9. Separate approx 2" inches apart.


10. Bake x 12 minutes. Cool on a baking rack if you have one.


Say goodbye to these puppies within minutes of making them and have some ice cold milk on stand-by!