Monday, May 2, 2016

Strawberries Delight

Strawberries are simply awesome--stand alone sweet or combined with other flavors--these little bites make for an easy snack or light dessert! In other words, ideal for college cooking and college living especially when the farmer's markets start opening for business. Try seeing which fruits you can get during prime season to make your meals (and eating) bursting with flavor (and nutrition).


The recipe I am posting below was listed on the last page of Cooking Light May 2016 edition--almost like a side note or after-thought or space-filler--but what an idea for anyone trying to keep desserts simple, clean and healthy without sacrificing deliciousness and cravings. 

Additionally, this hidden gem of a recipe identified a simple way to ensure common leftover ingredients like low-fat sour cream do not go to waste, but instead, get incorporated as a component to making your fruit salad "sing"--multi-use in other words!  Add a few small chocolate chip cookies and you are good to go!

Would recommend less sugar when the berries are sweet...maybe none at all!)

Strawberry Delight

Equipment:
Large bowl 
Paring knife
Mixing bowl
Whisk

Ingredients:
1 lb of rinsed, hulled and quartered strawberries
3 Tbls of sugar or use Vanilla Agave syrup
1/2 tsp grated orange rind
2-3 Tbls of orange juice
1-2 basil or mint leaves, finely chopped (optional)

Dipping Sauce:
7 Tbls reduced-fat sour cream or greek yoghurt
1/4 cup heavy whipping cream
1 Tbls sugar
1/4 tsp vanilla extract

Instructions:
1. Wash your hands and the strawberries. 
2. Prep your fruit.
3. Add sugar, orange rind and orange juice to the strawberries. Let stand x 20 min.


4. Prep your dipping sauce by combining sour cream, whipping cream, sugar, and vanilla.


6. Enjoy the sun in your mouth today!

Sunday, April 24, 2016

Open Faced Pitas

Brain cells studying for finals need fuel and quality nutrients, but if time is tight, human nature will settle for less!  

Tell me about it--I have been hibernating while studying for my own boards in medicine--ugh!! Let me say, it is extremely hard to stay on course with eating and staying healthy, i.e. going to the gym and getting sleep, especially if you are working and/or going to regular classes simultaneously!

Prep some condiments going into finals week, like Greek Tzatziki or Hummus; or, spend a few bucks to buy one or two storebought versions of your favorite spreads for crunch time! And don't forget to stock the fridge with fresh fruits and veggies--the variety makes your options endless!


In a pinch you can load a toasted pita like a pizza; and, begin layering flavors according to your taste--be creative! These can be "cold" or you can broil cheese over a layer of veggies or meat; or, make it sweet! 

Check two options below:
1. Cool Mediterranean /Greek
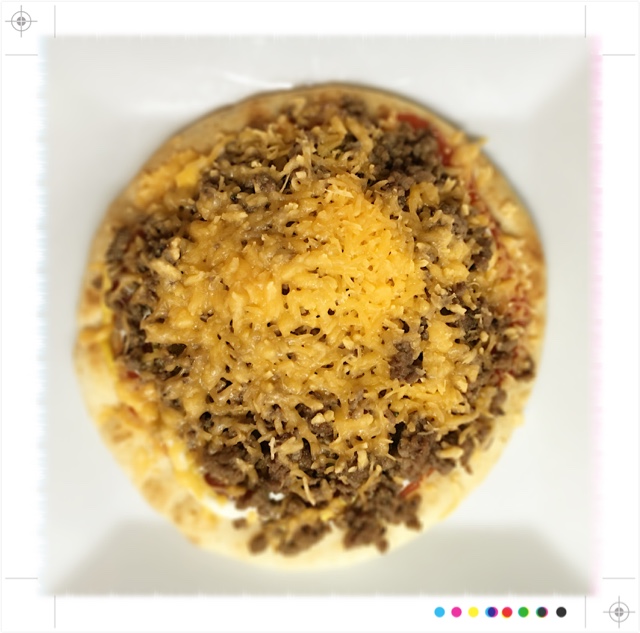
2. Cheeseburger Heaven 

But, see what you got:
--Nutella, Bananas with Peanut Butter Drizzle
--Vanilla Yoghurt, Strawberries with a Touch of Honey and toasted nuts
--Cinnamon Sugar (broiled) with loads of fruit and a dollop of yoghurt
--if you have roasted chicken leftover, say no more

Open Face Pitas

Equipment:
Toaster Oven or Regular Oven with Broiler

Ingredients:
Really...the world is your oyster here, but I laid out a few:

--quality pita rounds (I like Kronos)
--quality hummus--garlic, roasted red pepper, original
--thinly sliced red onions
--thinly sliced cucumbers
--good feta
--cherry tomatoes--red, yellow

Condiments:
Greek Tzatziki
--follow link to recipe

Lemon-Tahini Spread
1/3 cup tahini
2/3 cup greek yoghurt
1-2 Tbls lemon juice
1-2 Tbls water
Salt to taste
--Adjust liquids to consistency you prefer, i.e. runnier or more like a spread.


Instructions:
1. Wash your hands.
2. Prep your ingredients.
3. Toast your pitas or heat your pitas on the grill or skillet.


4. Begin layering with one of the spreads, i.e. tzatziki or hummus
5. Start adding cucumbers, red onions, feta, tomatoes and spices.


6. Drizzle with olive oil or tahini dressing.

7. If making the Cheeseburger option, I think you know what to do:
--favorite ketchup, mustard, and mayo
--pickles, onions if you got 'em
--ground hamburger
--cheddar or American cheese


8. Broil any of the combinations that require a quick melt!

Yahoo!! Hooyah!
Stomach satisfied. Brain functioning again on all cylinders!

Good luck folks with finals!!

Sunday, April 3, 2016

Kedgeree

What the heck? Never heard of 'kedgeree', but I am always a sucker for trying something new! This meal is apparently quite popular in the United Kingdom, even for breakfast; and, basically, boils down to combing rice, veggies, fish, and eggs--almost like a fried rice meal!


This is a great option for leftover rice and other partially used vegetables waiting to mold in your fridge! I would note that several separate simple steps go into the culmination of this dish, but it is well worth the effort--you can save some time if you have extra skillets--but if not, one will do. 

 Time for a challenge, folks!!

And, if I failed to mention this before, Blue Apron is to thank for this great new recipe perfect for college cooking! The name 'Kedgeree' may be weird, but this makes easily 4 servings to share with friends--share a meal, feed a friend, no college kid hungry!

(Adapted from Blue Apron recipe)

Cod Kedgeree

Equipment:
Large non-stick skillet
Small saucepan, for rice unless you have some left over
Zester

Ingredients:
2 Cod fillets, salt and peppered on both sides
2 eggs, lightly beaten
1 cup cooked basmati or white rice
1 yellow onion, halved and thinly sliced 
1 lime, zested and then quartered
1/4 cup flour
1/4 medium cabbage, thinly shredded 
1" ginger, minced
Olive oil
Vegetable oil

Spices (depends on your flavor preference):
1/2-1 tsp ground ginger
1/2-1 tsp ground garlic
1/2-1 tsp ground coriander and/or cumin
Salt & Pepper


Instructions:
1. Wash your hands.
2. Cook rice, shred cabbage, slice onions, mince ginger, and zest lime.
3. Prepare the crispy onions:


  • Toss thinly sliced onions in 1/4 cup flour
  • Add 1/4" layer of vegetable oil to another skillet
  • In small batches, fry the onions until golden brown, remove to paper towels and salt.
  • Set aside until ready to serve.


4. In a large skillet over MED-HIGH heat, sear cod fillets on both sides in olive oil x 2-3 min until cooked. Set aside to cool before shredding.


5. Add 2 tsp olive oil and cook the shredded cabbage until lightly wilted. Salt & Pepper. Set aside.


6. Add ginger to skillet until fragrant.
7. Add slightly beaten eggs to the ginger and stir frequently.

8. Add cooked rice, shredded cod, wilted cabbage, zest, and spices. 


9. When ready to serve top a bowl of rice with the crispy onions.


Dig in!


Sunday, March 27, 2016

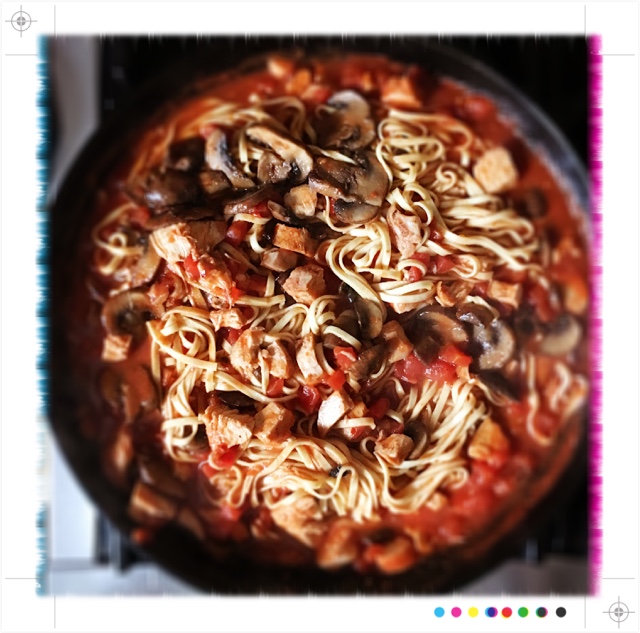
Chicken Cacciatore

Learning to cook is one of the best skills anyone can learn; in fact, I think it's one of those life skills that should be mandatory! But what if no one you know cooks? Not even your parents? What if you do know how to cook, but have little equipment or little money to spend on an extensive spice rack and pantry? 

Good news! Companies like Blue Apron and Plated are trying to make cooking as simple and convenient as possible for anyone craving home-cookin'! They literally send everything you need for a great meal right to your door--exact ingredients, pre-measured with a colored sheet of paper picturing each step--this is perfect for anyone on a busy schedule or who may not have time to stop by the store! 


In fact, parents could make this a really cool gift for their college students who enjoy cooking over microwaving, but don't have time to shop.  Young professionals and grads might consider this option with one of these companies, because it is actually quite cost-effective (especially Blue Apron)--3 meals for two people with leftovers, delivered to your door for $60/week--so, if you are on your own, this translates into at least 2 servings per meal! All you do is come home, unpack the ingredients and assemble!  

If you like the recipe, you now have a copy of the recipe for future use! One such recipe we tried is featured below!

(Adapted from Blue Apron meal service delivery)

Chicken Cacciatore

Equipment:
Large skillet--non-stick or not
Large saucepan, for boiling pasta

Ingredients:
2 Chicken Breasts, seared, cooled and diced
8 oz white mushrooms, cleaned & sliced
3 cloves garlic, minced
1-2 tsp red pepper flakes (according to spice preference)
2 (15 oz) Crushed Tomatoes plus 1 cup water
Salt & Pepper

12-16 oz of fettuccine or linguini, cooked and drained.
Parmesan, for garnish
Basil


Instructions:
1. Wash your hands
2. Sear the salt & peppered chicken breasts in 2 tsp olive oil and 1-2 tsp butter.
(If you have large chicken breasts, you may need to finish them in an oven at 350F degrees for 15 additional minutes to ensure they are adequately cooked)


3. Remove chicken breasts and set aside to cool before chopping and dicing.
4. Add 2 tsp of olive oil to skillet and sear mushrooms x 5-6 minutes.
5. Add garlic, red pepper flakes, salt and pepper. Cook until fragrant.


6. Add tomatoes plus 1 cup water and simmer on low heat until sauce begins to thicken.


7. Cook your pasta and drain.
8. Add chopped chicken and pasta to the mushrooms and tomato sauce.


9. Serve it up with parmesan and basil or a sprinkle of parsley.


Invite a friend--you will have more than enough and then some!

Sunday, March 20, 2016

White Bean Winter Stew

The sun may be shining today, but Chicago is still lingering in the 30s again! Plan to warm up the house tonight with this incredibly delicious tomato-based stew--another recipe featured at Healthy Kitchens Healthy Lives conference last month--invite the roommates to dinner and have them bring a loaf of crusty bread and butter! 


That's really all you need for a fantastic meal and good times on a cold winter day!

This is an easy, super cheap, but hunger-quenching recipe simple enough for even a dorm kitchenette and college cooking. Trying to live healthy while being frugal wont get any easier than this for low-income college living!!

(Adapted from The Bean Institute recipe vault)

White Bean Winter Stew

Equipment:
5-quart saucepan
Handheld Immersion Blender (optional)


Ingredients:
1/4 c bacon, diced
1 medium yellow onion, diced
1 small shallot, diced
3 cloves garlic, minced
1 tsp oregano
1/2-1 tsp smoked Chipotle Powder (optional and spicy)
1 28-oz can diced tomatoes
2 cups chicken broth
2-3 cups of a white bean (prefer Cannelini Beans)
1 tsp marjoram
1/2 tsp kosher salt
1/2 tsp pepper
Olive oil to drizzle
Parmesan cheese, grated


Instructions:
1. Wash your hands.
2. Cook the bacon in a large 5-quart sauce pan until slightly crispy and browned.


3. Add onions and garlic and cook until translucent.
4. Sprinkle oregano and chipotle powder onto the onions and stir.


5. Add the can of diced tomatoes and broth. Simmer on low heat x 30 minutes.


(if you have an immersion blender use it to make soup smoother...or not!)

6. Add 2 cups of beans (if you like beans add 3 cups total).
7. Add the marjoram, salt, and pepper to taste.


8. Simmer on low x 2-3 minutes.
9. Serve with a little olive oil, parmesan and basil.
10. Don't forget the crusty bread!