Showing posts with label marshmallow treats. Show all posts

Tuesday, September 27, 2016

Salted Brown Butter Krispy Treats

There is a place in Chicago called Summerhouse with the most perfect Brown Butter Rice Krispy Treats that melt in your mouth as you walk out the door. 


I have always wanted mine to taste like theirs--2 inch squares of chewy, buttery rice krispy treat goodness--but mine never have until I discovered Smitten Kitchen's version tucked in the back of the cookbook! 

I will forwarn you that this is not microwave krispy treats--attention is required along with a little extra equipment (and maybe practice to brown the butter) to get the prize. But, don't let those issues deter you from trying something so delish!

Salted Brown Butter Krispy Treats

Equipment:
Large 5-qt pot
Large mixing bowl
8" x 8" non-stick pan with 2" sides
Butter, for greasing pan
Seran Wrap, for spread gooey goodness easily
Wooden spoon

Ingredients:
6 cups rice crispy cereal
1 (10oz) bag mini marshmallows
8 Tbls butter (1 stick)
1/4 tsp flaky sea salt (Maldon Salt)


Instructions:
1. Wash your hands.
2. Prepare all equipment and ingredients.
3. In a large pot, melt 1 stick butter over medium-low heat. 


Note: I have 1 1/2 sticks butter in picture because I was making 1 1/2 batches

4. Pay attention and do not leave--the butter will melt, foam, and turn clear golden.
5. Turning golden brown will occur very quickly along with a nutty aroma filling the air--make sure you are stirring the butter mixture frequently...and, do not walk away.


6. Once the butter is brown, turn off the heat, sprinkle salt into butter and add the marshmallows--these should melt fairly quickly into a smooth texture--but, if you need to, add a little heat briefly to melt remaining puffs.


Because of the browned butter, the melted marshmallows will look slightly dirty!

7. Remove the pot from the stove and stir in the cereal until all of it is evenly coated.
8. Scrap the cereal mixture into the prepared and buttered 8" x 8" dish.
9. Use plastic wrap to smooth the top and flatten without getting your hands sticky.


10. Set aside in the fridge briefly to facilitate cooling and setting, but then...who's watching...get your friends and dig in...I know you want one!


Saturday, September 17, 2016

Smore Bites

Lookin' for new ways to have old classics I stumbled upon this version of 'Smores from Baking With Blondie!


For some, this recipe will be missing the bonfire ambiance, and for others it will be "just too cumbersome"; but, for those who push thru the detail work...enjoy! On the other hand, Mom just might be open to suggestions over Fall Break or Parents Weekend!

S'more Bites

Equipment:
Mini Muffin Tin, sprayed with PAM
Mixing Bowl
Large ZipLock Bag
Large Food Can (if you don't have rolling pin or processor, crush the crackers in bag)
PAM spray

Ingredients:
7 whole graham crackers, finely crushed 
1/4 cup powdered sugar
6 Tbls butter, melted
1/2 cup dark chocolate chips
Large marshmallow, cut in half

Extra Chocolate Chips, for melting and drizzling on final product (optional)


Instructions:
1. Wash your hands and preheat oven to 350F degrees.
2. Grind or crush or process graham crackers until finely crushed.


3. Add powdered sugar and melted butter, mixing until coarse mixture.


4. The mixture should be formidable but not too sticky or greasy.


5. Spray mini-muffin tin with non-stick spray.
6. Using the back of a measuring spoon, press 1 Tbls of crust mixture into each cup.


7. Bake crusts x 4 minutes.  Be careful not to burn these.
8. Remove from oven and add 3-4 large dark chocolate chips to the base. Bake x 1 minute.


9. When ready to serve, place 1/2 of large marshmallow on top of your cup.


10. Broil cautiously until you start seeing that golden brown color we love so much! 
11. Allow to cool and set x 2-3 minutes before removing cautiously from the muffin tins.


If you want to get fancy, slowly nuke a handful of chocolate chips, and drizzle over top before inhaling! 


P.S. Cautious broiling is the best way to brown marshmallows if you are stuck inside!

Sunday, February 21, 2016

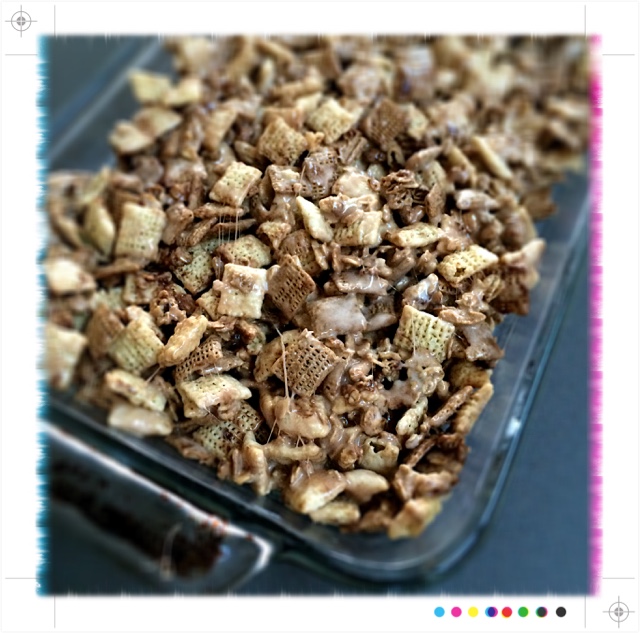
Kitchen Sink Marshmallow Treats

Sometimes you just have to improvise in life! Same thing with certain recipes like pasta dishes, salads, monster cookies and rice crispy treats--sometimes you just have to use what's in your cupboards. These recipes, other than the basic batter or basic sauce, are open to your imagination.


This variation of the classic rice krispy treat is basically a marshmallow treat on steroids! (Let me be clear, however...nothing replaces the original rice crispy treat!!) The original recipe from Jelly Toast (www.jellytoastblog.com) calls for Chocolate Chex cereal, but I only had Rice and Wheat Chex in available at the grocery store. So, I went with that, because I wanted marshmallow treats now; and, well, that shouldn't stop you, right?

See what you come with! You could add chocolate chips or bulk up the mix with a variety of leftover cereals, but remember Math 101 and make sure you have the right ratio of marshmallow filling to dry ingredients, i.e. enough marshmallow batter to coat all of the dry ingredients you want in your mix! 

Great easy dessert 4 college cooking and for using up leftover cereals--leave no waste behind!

Kitchen Sink Marshmallow Treats

Equipment:
9" x 13" Pyrex Dish, lightly greased
Large Mixing Bowl
Spatula
Microwave


Ingredients:
1/4 unsalted butter, melted
1 (10.5 oz) bag of Mini-Marshmallows
5 cups Chocolate Chex (or any Chex cereal or other cereals)
2 cups Chocolate Coconut granola
4 oz chocolate chips, melted
1/2 cup toasted coconut flakes


Instructions:
1. Wash your hands.
2. Grease pyrex dish. 
3. Have cereals measured and combined.
4. In the microwave, melt butter in 30 second intervals and add marshmallows. 


5. Work quickly stirring the marshmallows until a smooth white batter remains.
6. Add cereal and granola.
7. Press mixture into greased pyrex.


8. Drizzle with melted chocolate chips. 


9. Top off with toasted coconut flakes.


10. Let set at room temperature before cutting and consuming!